Installing your SENse Tile

Installing a SENse Tile into an existing ceiling involves several steps to ensure a safe and proper installation. Keep in mind that specific instructions might vary based on the ceiling design.

Here’s a general step-by-step guide:

fixed size interactive projector discretely seated in a suspended ceiling

Whats in the box

  • SENse Tile
  • 2x SENse Tile securing cables
  • SENse Tile remote control
  • BenQ remote control
  • 5 meter Power cable
  • 2x mini WIFI antennas
  • Information sheet
  • Accessory pack


Remove the Ceiling tile

  • Locate the most appropriately located ceiling tile, this should be located centrally over the projected area
  • Carefully remove the existing ceiling tile. You might need to slide it out of the grid or gently pry it out, depending on the ceiling type

Install The SENse Tile

  • Place the SENse Tile in the opening you’ve created, ensuring it’s properly aligned with the surrounding tiles.
  • Check the circular ventilation vent at the back of the tile. Ensure that it is not obstructed.
  • Attach Securing Cables if required
    • Attach the securing cables to the SENse tile’s attachment points and the structural. Make sure the cables are taut but not overly tight.


Install the power cable

  • Position yourself on the ladder or scaffolding to reach the adjacent tile next to the SENse Tile and remove this tile
  • Carefully run the cable, keeping it away from potential hazards like sharp edges or sources of heat.
  • If the power outlet isn’t close enough to the SENse Tile location, an extension cord might be needed. Make sure to use a cord that’s rated for the necessary load.
  • Align the plug with the power input on the SENse Tile and insert it until it’s fully connected.

Install the antennas

  • Locate the antenna ports on the device. Begin to screw the antenna onto the antenna port in a clockwise direction, until it is firmly in place and doesn’t easily rotate.

Turning on the SENse Tile

  • Gently remove the white safety cover from the bottom of the SENse Tile
  • Identify the power switch on the SENse Tile and using your hand, gently toggle the switch into the “I” position.”
  • Hold the SENse Tile remote control comfortably in your hand, ensuring you have a clear view of the SENse Tile. Point the remote control directly at the SENse Tile and gently press down on the red button

Software validation

  • The Imaginate software will attempt to validate the licence. If this fails your machine will need to be connected to the internet
  • To manually connect to the internet you will need to exit out of the Imaginate software. Press the home button on the remote and choose the settings button.
  • Select Networks and connect to your WI-FI
  • If validation fails please call 01283 551551 During office hours
  • Once the software has validated, the Imaginate software will begin to play interactive activities until you press the home button on the remote.

Settings

Settings- Access to the following sub menu

  • Networks – Connecting to your WIFI
  • Resize- Change the size of the image to suit the surface you are projecting onto
  • Light Calibration- Select this option if you feel the interaction is slightly out or you have moved from a darker room to a lighter room
  • Restart- Restart the machine and software
  • Shutdown- When you have finished with the unit, turn of the machine here

Play

Play – Access the following sub menus

  • Shuffle All- Select this option to randomly play all the activities available within Imaginate
  • By Profile- Select the profile button to choose a specific profile, either a default one such as Christmas or one you have created via the Cloud Editor.
  • Browse Library- Search through all the available activities and choose an individual activity to play
  • Themed- Select the themed option to play the activities that have been created based on the current them i.e winter, Easter etc.

Hidden Menu

Imaginate can read aloud any text within the activities such as questions and within the story board

To enable to text to speech press the button with the three lines and select the enable text to speech button

Switching off the unit

  • Select the home button on the remote to go back to the main menu
  • Select the settings icon
  • choose shutdown

This is shutdown the software and the SENse Tile

The App

Included with your Imaginate subscription is access to the Imaginate App. When you log into the Cloud Editor there is a link to download or it can be downloaded from the Play store or App store. (Search for Imaginate Integrex Limited when in the store). The App allows you to instantly play activities or profiles directly from a phone or tablet.

  • Login to the Cloud Editor (your user name and password are on the laminated sheet supplied with the unit), if you have misplaced these then please get in touch
  • Enter the admin screen
  • Press the i button next to the machine you want to link to the app
  • A pop up box will appear and a link in the right top corner which says view link code
  • Scan the QR code with your app on the tablet or phone

Cloud Editor

With your SENse Micro you will have been provided with a laminated sheet containing a username and a password for your Cloud Editor.

To access the Cloud Editor visit

http://www.touchthefuture.co.uk

Enter the user name and password provided on the laminated sheet

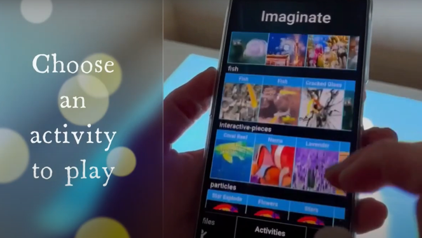
Once in the Cloud Editor you can create new activities and profiles as well as import your own images, videos and sounds to help with the content creation.

Please see the How to Video for Imaginate to learn all about the Cloud EditorĀ https://youtu.be/Ovz4A2U4fhE

Contact us today to learn more about our SENse range of interactive projection and how they can enhance the lives of your service users.